Last week I wrote a post about what I will be sharing on the blog in 2015. I mentioned wanting to get back to doing a few tutorials and decided to pick a project that we could work on together – so welcome to my first Quilt- Along. Go grab a cup of coffee and read long! (even if you aren’t interested in a quilt-along, you can just read along and hopefully you will pick up a few tips).
Today I am going to show you what we will be working on and I will talk about how I selected the fabric for this project. I have so many people who ask about this, so I know there are many of you who are wondering about my process.
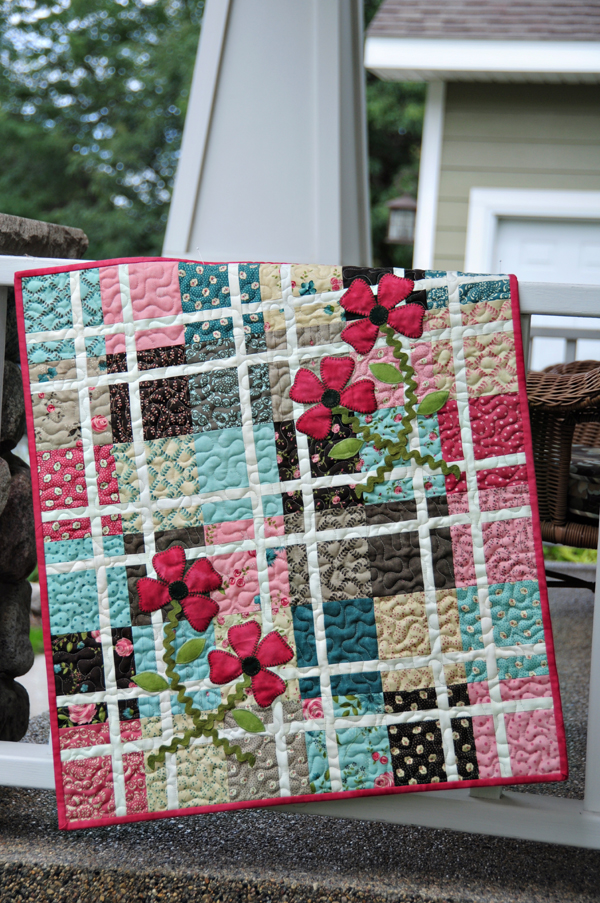
I have chosen the pattern Pretty in Pink Mini.
I selected this pattern because:
A. I wanted to make another one 😉
B. I have a lot of things that I can teach from with this pattern
C. It’s small – so it isn’t a huge time commitment for you to join me in the quilt along
D. Many of you probably have a charm pack lying around that is waiting to fulfill its quilt destiny and become something beautiful.
The quilt finishes out at 24″ x 27″, requires 1 charm pack, 3/8 yard of cream, 1/3 yard pink for the flowers and binding, 1 1/4 yards of 1/2″ wide green rick rack, assorted scraps for the applique, a fusible product and thread for the applique. The pattern is available for $5 (paper pattern here or PDF here.)
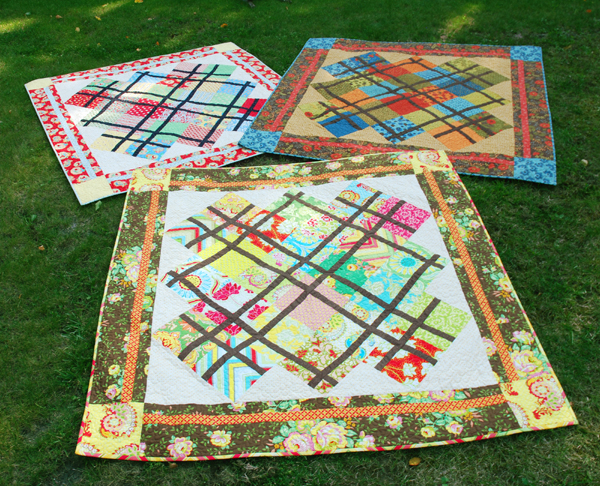
For those of you who would like to make the larger size shown below, you can. The larger size was originally published a few years back in our Living Large book and requires one layer cake, along with some additional yardage.

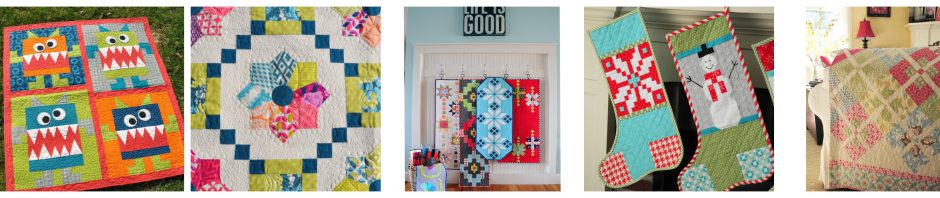
Today I want to talk about fabric selection. First of all, I want to show you the other quilts I’ve made with this design. One of my favorite things to do is make the same pattern again in different fabrics, just to see how different it looks in other colors.


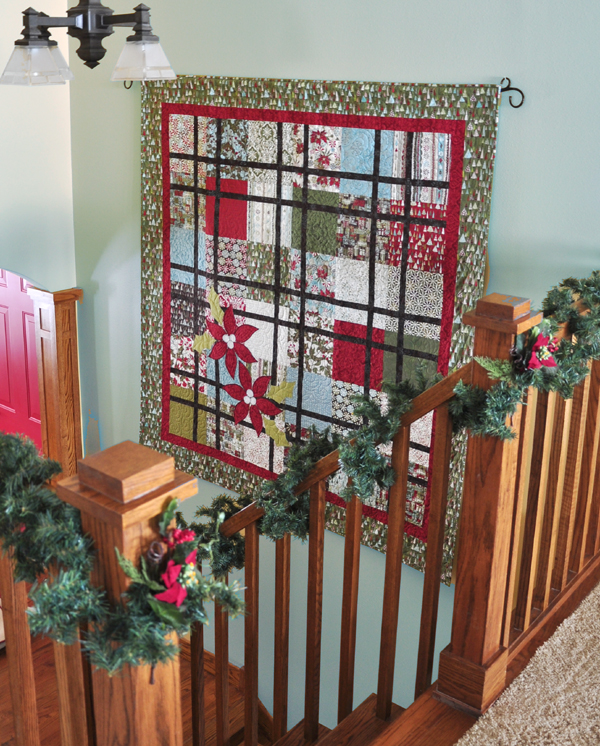
For this option, I added borders, used a dark sashing and changed the applique to something more Christmassy.
In this version, I set the blocks on point and went with a very dramatic black lattice. (By the way, this was the very first version of the pattern, but it ended up in the reject pile.)

For some reason I made that version 3 times!
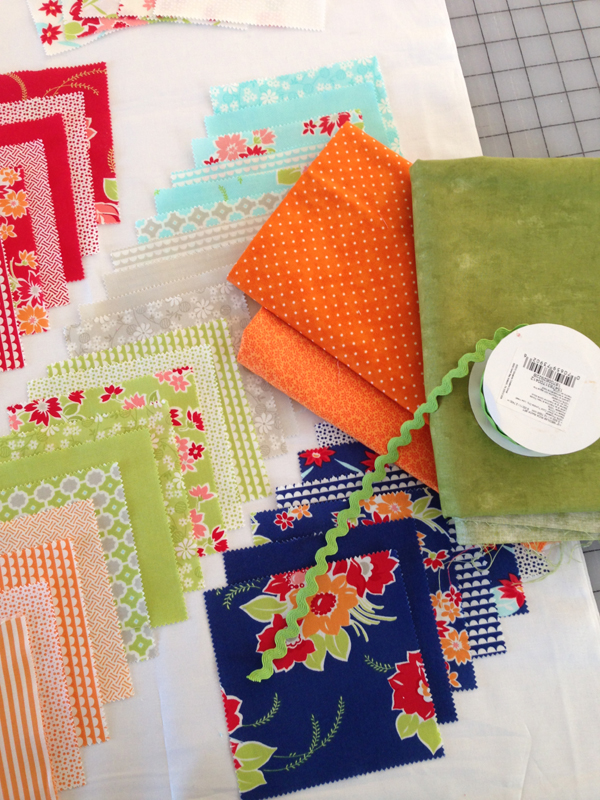
For our sew along, I am using Miss Kate by Bonnie and Camille. The pattern is written for Precuts, and that makes the first part of the fabric selection process so much easier. I used to spend hours pulling fabrics from my stash, cutting a 5″ square off each piece, folding them all back up and putting them away. No more baby – Just whip out that charm pack and all the colors are already cut and, as a bonus, all color coordinated for you by the designers of the collection!

The second step in the fabric selection process is to open up the pack and lay out all the fabrics so you get a better look at the line. When I laid them all out, I arranged them on white fabric because that is the color I wanted to use for the sashing.

Don’t they look cute together? See that little pile of white prints at the top? I already eliminated those because I thought they didn’t set off well enough from the white sashing fabric. If there isn’t enough contrast, the pattern will be lost in that block. The sashing fabric is going to touch every color in the line, so it has to set off from every print. To figure out what to use as this contrast print, pick a different color from anything in the line, OR use a print way lighter or darker than the rest of the prints in the line. White, brown, black, and cream are example of colors that I have used in the photos above.
Step 3 – Figure out a possible color for the applique. In this case, I chose the color that had the least amount of prints in the line. Notice that there are only 3 of 4 orange prints, so I went with that color. I also made sure to use a little bit darker tone of orange in a more solid print to ensure that it would stand out. I did the same with the green for the stems.

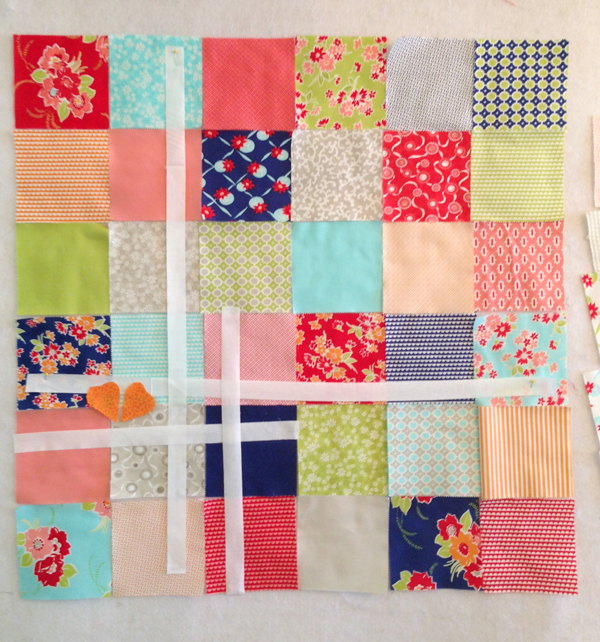
Step 4 – Arrange all of the prints on a design wall to see how they will actually look in the quilt. I even cut out a few sashing strips to audition. This will also be the fabric placement in the final quilt. I like to figure that out ahead of time, if possible, rather than just winging it. That way I don’t end up with two prints next to each other, etc. I made sure that none of the orange or green prints would be underneath the applique, as that will help keep the applique from blending in with the busy background.
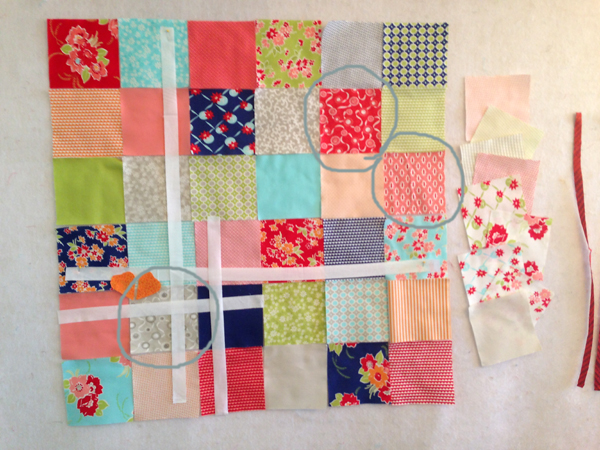
Step 5. Next I eliminated a couple of the low volute prints, because I just didn’t think they set off enough from the sashing. They looked fine when I had them arranged by color in the first photo, but once I mixed them up with the other prints, they got lost (see the squares on the right hand side of the photo below). The squares in the quilt that have grey circles around them show the new prints that I added to the mix. In this case, I have a stash of leftover Precuts by the same designers that I could easily mix in. If you don’t have any scraps lying around, consider cutting an extra square from your binding or backing fabrics.
When I first started quilting, I just selected my fabrics and started cutting and sewing. After I was done with the project, I would kick myself for my bad choices that were now permanent. I am not good at having a total vision for my project. I have to go step-by-step,, auditioning as I go. By taking the time to do all of the above steps, it helps ensure that I will like everything in the end. Now take a picture with your cell phone, ipad or camera so you can remember your fabric placement.
Step 6 – Now that I am happy with the color arrangement, I am ready to cut. Because of how this quilt is made, my fabric selection also helped me determine the placement of all the prints so now I just took down every other square and cut them as shown in the cutting diagram on page 1. (Please note that if you are using directional prints, you will need to pay attention to the direction of the prints before cutting them.) Set aside for Step 1 in the sewing directions. Take down the rest of the squares and do the same for Step 2 in the assembly instructions.

One other word of caution, cut carefully! There isn’t a whole lot of waste with this pattern. As you can see below, I use a small rotary cutter when working with these small pieces. It makes it so much easier to maneuver when cutting around these small pieces, plus it’s easier to see around.

A couple of words of advice about Precuts:
The cutting instructions for this pattern show a little cutting diagram to help you with the cutting. Notice how there is no waste going one direction. To make that step easier, I position two rulers next to each other as shown.

Measure over with the first ruler as specified by the pattern. Lay the second ruler next to it and make sure that you have enough fabric left to make the second cut. Once everything is in the right place, pull the second ruler away and cut.
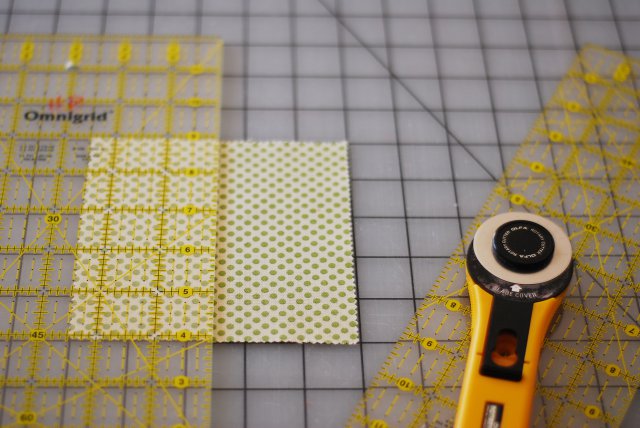
My charm squares were actually 5″ by almost 5 1/8″. I made sure to turn the blocks so that the 5 1/8″ was running the direction that required all 5″. That way I could trim a little off the pinking on each side. (for more hints on cutting precuts, see my tutorial here)
That’s all for today. I hope you found some of these hints helpful! I also hope some of you will join along in making this project with me. If you do, please post pictures to share with the group. I would love to see the fabrics that you are using! Please use the hashtag #prettyinpinkqa. You can also post questions for me in the comments here on the blog and I will do my best to answer – just be sure to check back to see the answer to your question.
You have the next week or so to select and cut fabrics. Next week I will post on making the blocks.


Love let the good times roll. Is that a layer cake and what is the name of those 10″ cuts.i think I would possiby like to join the quilt song. I love the first plan without the applique. Be a great quit for a charity quilt or kids in need or fora cancer quilt. 😀
I plan to sew along with you. Your tips were very helpful, especially laying it out on a design wall to place colors evenly and then taking off every other one to sew. I’m making a baby quilt size with 20 blocks of 10″ squares as shown in Living Large, which I have. The quilt will be 100% from stash, ric rac and all!
You can submit your Quilt Along to http://www.QuiltAlong.net for more publicity. It’s free and super easy. Just fill out the form at the bottom of the Quilt Along section.
Have you considered making a button to go along with your quilt-along?
I am looking forward to this quilt along. It will be my first time doing this. I love your quilts and enjoy reading your blog. Thanks so much!
Oh fun! I have this pattern and think I will,plat along!
I’m joining in! I’ve never done applique, so we’ll see how that goes. Will you have instructions for the applique when we get to it? The pattern just says to prepare the applique according to the manufacturer’s instructions – I have no clue! LOL Thanks for having this quilt along. Your Rebel Roses line was the first fabric line I ever bought. I made some bags & a zip pouch that I use every day, and I still have scraps that I just can’t bear to part with. I’m so excited that you’re on IG and to be doing a quilt along with you!
Yes, I will talk about the applique and give some hints. Thanks for joining in the quilt along and on instagram 😉
Hi, I like your pattern “Pretty in Pink” very much, and tried to buy it as a pdf file. But unfortunately you can’t send it to Norway. The idea of getting it via mail is great, and it’s to bad that it’s not aloid. But I wonder if it’s possible to have it sent by post? Regards Jorunn Andersen
I just added Norway to the list of countries that are allowed for PDF files, so you shouldn’t have any trouble ordering it now. We can also send a paper pattern if you prefer. Both options are available on the website
I don’t usually join in Quilt Alongs. I have more than enough tops of my own, just waiting to be quilted. I have more than enough WIPs, kits and idea to keep me busy for decades. So, I do NOT need to participate in a Quilt Along, as that will simply produce another top for me to quilt.
BUT .. I just *love* the pattern. I *love* the applique. And the prospect of doing just a little at a time will allow me to join in AND still work on my own stuff. 😉 So, I’m glad .. I think! .. that you posted such a delightful pattern. 🙂 Thanks!
I know not everybody can join it. I totally understand that everybody is busy! But I hope that, like you said, many will join in by just reading along and picking up a few tips along the way 😉
I have so many projects going right now that I may be late in joining this quilt along. I’m going to show the pattern to my granddaughter and see if she’s interested. Maybe we can do this together! Thanks so much for doing this! I love all of your patterns and just the whole wonderfulness of your talent, your blog, and your family!
Thank you
Heather for this wonderful opportunity. I love anything that you do. Your fabrics are always so beautiful!
I have posted my progress on my blog and on Facebook using #prettyinpinkqa. http://busyhandsquilts.blogspot.com/2015/01/pretty-in-pink-quilt-along-fabric.html
I have created a Pretty in Pink Quilt Along button that links to this post. You can see it in the sidebar on my blog: http://busyhandsquilts.blogspot.com/ If any of you choose to use the image, please host it on your own site rather than using my bandwidth.
Pingback: Pretty In Pink Quilt Along Part 2 | Trends and Traditions
I love this quilt I need a quick project to get back into quilting. Thanks for the idea. Regards Janine
How do I get the pretty in pink quilt pattern
Hi Cindy – You can find the pattern here:
https://ankastreasures.bigcartel.com/products?search=pretty+in+pink&search-submit=